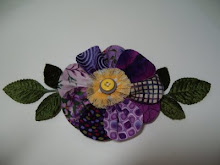
I have a feeling this is going to be a long one so grab a cuppa, settle in, and relax a spell. Here goes.....
Many people consider a fabric yo-yo a take-along project. You know, small, lightweight and easily transported from one place to another. You can complete a few while waiting for a doctor's appointment, or while watching your child play sports. I agree with the concept that it makes a wonderful portable project. This is good if you like to have a stash of yo-yo's available to embellish your projects with. If you are planning to make a quilt, you will end up with a huge pile of yo-yo's that will eventually need to be joined together. Many people choose to whip stitch them together from the backside of the quilt. I'm not too keen on this method as it leaves all of your stitches showing, no matter how neatly it is sewn. I would like to show you how I join yo-yo's from the inside before gathering the yo-yo and tying it off. I do not consider this method a take-a-long because you'll be working with the quilt or large segments of the quilt at one time. You'll also need a rather large surface to work from. I frequently read questions on message boards asking how to join yo-yo's together. I'd like to share my method with you.
You will need to decide how large you would like your finished quilt to be. You'll also need to determine how big you would like each completed yo-yo to be. Take the width of the finished quilt size and divide it by the completed yo-yo size to determine how many yo-yo's you will need in each row. Calculate it the same way for the length. Multiply the number of yo-yo's in the width times the length and you will get the number of yo-yo's needed for your project.
I determined that I wanted to make a quilt using jumbo sized yo-yo's. I began with an 8-1/2-inch circle. This gave me completed yo-yo's 4-inches in diameter. You can make it larger or smaller, your preference. The first set of photos will be shown in plain muslin as it will be a little bit easier to see the markings. You can join yo-yo's using 4 or 6 connection points. I like the 6 connection point method when working with large yo-yo's. It will leave you with less holes or open spaces in your quilt. When using 6 connection points, every other row will have one less yo-yo in it. This forms a nice variegated edging to your quilt and is actually quite eye catching.
6 CONNECTION POINTS
I'd like to explain the 6 connection points first. I am not very high tech so you will have to settle for a hand drawn diagram. Please notice the tiny circles where each yo-yo intersects the other. These are the points where you will be hand stitching the yo-yo's together prior to gathering them and tying them off.

You will need to create a pattern for your yo-yo. I used an 8-1/2-inch circle cut from a sturdy piece of cardboard. I then cut out a 4-inch hole (the finished size of my yo-yo) in the center of the 8-1/2-inch circle. It will look like a donut.

In my case, the completed yo-yo will be 4-inches in diameter. I cut a 4-inch circle from a piece of paper as this will mimic the completed yo-yo. I needed to determine where the connection points will be. I folded the paper circle into 6 equal pie shaped pieces. Try your best to make sure that all 6 of your pie shaped pieces are equal. Transfer the 6 markings to the inside circle. These will be the connection points when stitching the yo-yo's together to form your quilt.

Trace the outside of the circle onto your fabric of choice being sure to mark a small dot where each of the 6 connection points will be. You can use a light pencil, chalk, disappearing ink pen, or whatever you want to accomplish this step. If you would like to cut several circles out at once by layering your fabric, you must still transfer the 6 connection points to each circle.

You will be using needle and thread to hand stitch the yo-yo's. With right sides together, matching the connection points, stitch securely. The larger the yo-yo, the bigger the stitching at the connection points should be. For my 4-inch yo-yo, I made sure that each connection point was sewn 1/2-inch. I took the time to make tiny stitches and reinforced them by going over each stitch several times. This is where the stress points of the yo-yo will be and you do not want your completed quilt pulling apart. I found it much easier to connect a row of circles the width of my quilt, stitching each circle at the midpoint or equator and then connecting the rows together. You could opt to add each circle individually. The choice is yours.

This photograph shows two rows stitched together. It can get quite confusing at this point but once you get the hang of it, it will get easier. Take another look at the connection points diagram to keep on track. Since the first row will be the beginning of the quilt, you can now gather that row up and tie them off into yo-yo's. You may also choose to add fiber fill or rounds of cotton batting in each yo-yo prior to tying it off. Just remember to keep the next row open for attaching the next row of yo-yo's.

This diagram shows a completed yo-yo project. I know it's not the size of an actual quilt, but I wanted to make my point that when you reach the last row, you will gather and tie off each of the yo-yo's. Your project will be complete.

4 CONNECTION POINTS
The following will be diagrams showing the 4 connection method. I use it when attaching small yo-yo's together because small yo-yo's equal smaller holes in your finished quilt. If you are using large yo-yo's like I did, you may still choose to do the 4 connection method. Having large holes in your quilt may offer you a peak of the sheets below (especially nice if they coordinate well with your quilt). The choice is yours. The method is the same whether you use the 4 or 6 connections so I will run through it quite fast. Use the above information to guide you. Please note that using the 4 connection points method will result with rows with equal numbers of yo-yo's in it.
Diagram of connection points.

Your pattern piece will only show four connection points. To determine where these points will be, fold the 4-inch paper circle into fourths. Transfer the 4 markings to your cardboard pattern piece and then to fabric as you would with the 6 connection point method.

Connect the circles, forming a strip the width of your quilt. Then attach 2 rows together.

Gather and finish off the yo-yo's in the row that will be the beginning of your quilt.

Keep the last row open for adding additional rows.

Please imagine that this is a fully completed quilt. Notice that the first and last rows are now complete.

The following are photos of the actual quilt that I am making.
First,I cut out the fabric circles and marked each connection point.

I then sewed the circles together, matching the connection points to form rows the width of my quilt.

I connected 2 rows together.

I gathered the yo-yo's in the first row and added fiber fill to each of the centers prior to tying off.

The 3rd row was added.

The 2nd row was gathered into yo-yo's, leaving the 3rd row open for attaching the fourth row of circles.

While piecing my quilt, I prefer dividing it into several segments making it easier to work with. Each segment consists of 4 rows. Keep in mind that the segments that will be in the center of the quilt will require that you leave the first and last rows open. This will allow you to connect each of the segments together.

Congratulations if you were able to read this far without going bonkers. This is a photo of what my quilt looks like now.

You can also check out yesterday's post for several other pictures of my quilt.
I hope I haven't confused you too much and I also hope that I made enough sense to get you started on a quilt of your own. I have been caring for my sick cat since late last week so I'm pretty sleep deprived and stressed. I thought I would go ahead and post this anyway and if you need me to clarify anything, you can post to my comment section. I'll try to get back to you as promptly as I can. Thanks for stopping by. Happy quilting.
Aloha!
**This tutorial is intended for personal use only.**