Getting a late start here as I have been having trouble accessing my blog. One minute it's there, another it's gone. Poof, just like that. Really.
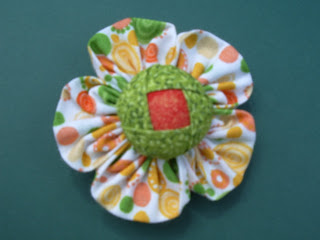
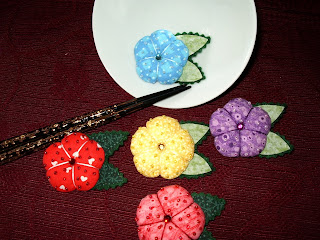
I'm sure you've already noticed that I have a fascination with pincushions. I can't stop making them. After designing the segmented yo-yo pin, I knew I had to make a pincushion similar to it. This pincushion has nine segments, I think maybe a little too many. At this point, the pieces get very small and get difficult to work with. I kept adding one segment after the other when I couldn't get the first and the last to meet without puckering. I think it turned out fairly well for a prototype.
This is my last pin for the month of February and probably for a while. Whew! Although I love making pins, it is time to move on to other things. I used fused fabric throughout as it adds body and also stops the ends from fraying. The circular scalloped center was made by a Fiskars scallop scissor. I think it adds interest to an otherwise plain center. It is topped with a tiny flower shaped button.
The tutorial I promised is coming along, slowly, very slowly. This tutorial business is alot of work and certainly not the instant gratification that I'm used to. Don't worry, I won't forget about it and hopefully will get it posted sometime next month.
I hope you enjoy your weekend.
Aloha!
Friday, February 29, 2008
Thursday, February 28, 2008
Pretty In Pink
Aloha! Ciao! Hello! I am beyond humbled that you all have found your way to my blog. I hope that you'll decide to visit often as I love sharing my craft projects with you.
Today is laundry and house cleaning day at Camp Polka Dot so this post will be a pretty short one. I have got to get the place in order so that I can play (craft) over the weekend.
Pretty in pink, this little gal has a painted clay flower pot body and a wooden knob for her head. She is wearing her finest sinamay hat adorned with green and pink ribbons topped with a pretty pink rose. Of course, her ensemble also includes a green and pink yo-yo, just because!
Here is a very simple pink polka dotted posie pin made from a fabric yo-yo. I tucked a tiny bit of polyester fiberfil inside the yo-yo to give it a dimentional look. It is also flanked by 2 citrus green fabric leaves . You will see this style of posie on many of my projects because I think it gives most items a sweet and whimsical look.
This is another project that I just completed. I love patchwork so I put this little pincushion together. It is also embellished with a yo-yo. I bet by now you're on yo-yo overload. LOL Sorry, [un]fortunately, there are still more yo-yo's to come in the future so hold on to your hat.
I'll be back tomorrow with my final pin project for the month of February. I wish you all a fab day!
Aloha!
Wednesday, February 27, 2008
The Luck of the Irish
Too early for St. Patty's day? I hope not. This lucky shamrock pin has a penny in it's center to bring you good luck. The penny is securely wrapped in tulle netting and the netting is attached to the shamrock. I did it this way to avoid damage to the penny as I am aware that it is illegal to alter or destroy currency. The penny can be removed by tearing the netting open. The shamrock itself is made from fabric which has been fused to felt.
This is a travel facial tissue holder that I embellished with a yo-yo posie. I just can't get enough of fabric yo-yo's. Love them.
This bag is probably the closest I will ever get to actual quilt making. The reason I don't make quilts is because I get too overwhelmed with their bulkiness. Just a heck of alot of fabric to deal with. Being a quilter wannabe, this bag is perfect for me. It is a nice, manageable size to work with. I love the vibrancy of the colors and most of all, it gives me the satisfaction of fabric piecing at the same time.
I hope you have a fabulous and inspiring day.
Aloha!
Tuesday, February 26, 2008
Yo-Yo's Again?
Yes, yo-yo's again! This little pin is made from a fabric yo-yo. I created 6 pie shaped pieces of coordinating fabric and joined them together to form a circle. This was a bit tricky to work with because each segment was very tiny. I then gathered the yo-yo in the usual fashion and added a tiny bit of fiberfil to give it a little fluff before tying it off. Of course, as always, a pretty button adorn's it's center and a couple of fused fabric-to-fabric leaves completes the look. This would be cute to pin to a denim tote, don't you think?
Doing my first tutorial was exhausting mainly because I'm pretty bad at photography. I have never taken so many blurry, out of focus pictures in my life. What you saw was the best of the best which was still not the BEST. Make sense?!?! LOL I had to edit like mad but I hope I got my point across. I have another tutorial in the making. It is way more involved so it will take time to do. I hope to get it posted sometime soon.
By the way, thanks to everyone who took the time to email me. It was fun hearing from people all around the country and the world! Hope you have a creative day...
Aloha!
Monday, February 25, 2008
Tutorial--Attaching A Fabric Yo-Yo by Sewing Machine
**This tutorial is intended for personal use only.**
I would like to show you how I have been attaching fabric yo-yo's to my projects with this tutorial. I have been doing it this way for over 25 years. When I first started attaching yo-yo's to projects, it was always difficult to keep the ends from flipping up or if I tacked them down, the stitches would always show. Instead of hand-tacking a finished yo-yo to a project, I use the sewing machine to do the initial anchoring. (You can also hand stitch the initial anchoring too). This tutorial will show you how to do this and then turn it into a lovely pincushion in the end.
This is my first tutorial so please be gentle. Here goes....
The first step is to cut one 5-inch fabric circle. This will be for the yo-yo in this project. Also, cut two 5-1/2-inch circles. This will be the top and bottom of your pincushion. They can be both from the same fabric or one each from a contrasting fabric.
Please note: A 5-inch fabric circle will make a 2-1/4-inch yo-yo.
Since the yo-yo will end up being 2-1/4 inches, trace a 2-1/4-inch circle in the middle of the fabric yo-yo on the wrong side. It should look like this:
Place the right side of your yo-yo circle to the right side of the top of the pincushion circle with the yo-yo side facing up. Pin in place. It should look like this:
Use your sewing machine to stitch completely around the circle you just drew.
Now, take needle and thread and hand sew the yo-yo using a 1/4-inch running stitch. Make sure to turn the raw edges in 1/4-inch as you sew. It will look like this:
If you'd like to give your yo-yo some body, this is the time to place some fiberfil in the center. It should look like this:
Pull the thread tight and knot off. This is your completed yo-yo attached to your pincushion top. This yo-yo isn't going anywhere. It won't lift up on the edges or shift and become lopsided.
To make the pincushion, pin the upper pincushion circle to the bottom pincushion circle, right sides together. It will look like this:
This is what the back of my pincushion looks like:
Stitch by machine around the edge using a 1/4-inch seam. Be sure to leave a 1-inch opening for turning. It should look like this:
Turn right sides out and it will look like this:
To complete your pincushin, stuff with fiberfil or your preferred stuffing and handstitch the opening closed using a slip stitch. You can stop at this point and you will have a lovely pincushion. As you can see, I went a little further as my pincushion has a handsewn ricrac embellishment, a button center and also has been tufted. Embellish as you please and most of all, have fun.
I hope this tutorial has been helpful. Many people have asked me how I get my yo-yo's to look so neat on my projects and it was always hard to explain it to them. Now, my friends, you have the inside scoop and complete with pictures to boot. Enjoy!
Aloha!
**This tutorial is intended for personal use only.**
I would like to show you how I have been attaching fabric yo-yo's to my projects with this tutorial. I have been doing it this way for over 25 years. When I first started attaching yo-yo's to projects, it was always difficult to keep the ends from flipping up or if I tacked them down, the stitches would always show. Instead of hand-tacking a finished yo-yo to a project, I use the sewing machine to do the initial anchoring. (You can also hand stitch the initial anchoring too). This tutorial will show you how to do this and then turn it into a lovely pincushion in the end.
This is my first tutorial so please be gentle. Here goes....
The first step is to cut one 5-inch fabric circle. This will be for the yo-yo in this project. Also, cut two 5-1/2-inch circles. This will be the top and bottom of your pincushion. They can be both from the same fabric or one each from a contrasting fabric.
Please note: A 5-inch fabric circle will make a 2-1/4-inch yo-yo.
Since the yo-yo will end up being 2-1/4 inches, trace a 2-1/4-inch circle in the middle of the fabric yo-yo on the wrong side. It should look like this:
Place the right side of your yo-yo circle to the right side of the top of the pincushion circle with the yo-yo side facing up. Pin in place. It should look like this:
Use your sewing machine to stitch completely around the circle you just drew.
Now, take needle and thread and hand sew the yo-yo using a 1/4-inch running stitch. Make sure to turn the raw edges in 1/4-inch as you sew. It will look like this:
If you'd like to give your yo-yo some body, this is the time to place some fiberfil in the center. It should look like this:
Pull the thread tight and knot off. This is your completed yo-yo attached to your pincushion top. This yo-yo isn't going anywhere. It won't lift up on the edges or shift and become lopsided.
To make the pincushion, pin the upper pincushion circle to the bottom pincushion circle, right sides together. It will look like this:
This is what the back of my pincushion looks like:
Stitch by machine around the edge using a 1/4-inch seam. Be sure to leave a 1-inch opening for turning. It should look like this:
Turn right sides out and it will look like this:
To complete your pincushin, stuff with fiberfil or your preferred stuffing and handstitch the opening closed using a slip stitch. You can stop at this point and you will have a lovely pincushion. As you can see, I went a little further as my pincushion has a handsewn ricrac embellishment, a button center and also has been tufted. Embellish as you please and most of all, have fun.
I hope this tutorial has been helpful. Many people have asked me how I get my yo-yo's to look so neat on my projects and it was always hard to explain it to them. Now, my friends, you have the inside scoop and complete with pictures to boot. Enjoy!
Aloha!
**This tutorial is intended for personal use only.**
Another Day, Another Year
Well, it was bound to happen. Over the weekend I added another year to my age. My birthday wish from hubbie was for a quiet and peaceful day to do whatever I pleased. My request also included that nobody ask, "What's for breakfast...lunch...or dinner?" Hubbie brought in take-out as I really didn't feel like getting dressed up and eating in a restaurant. A break from cooking was one of the best gifts ever. I also received a lovely bouquet of yellow lillies and red roses from my son and his girlfriend.
I am happy to report that I have a new and speedy computer. No more waiting on anything anymore. The old one was so slow it would frequently come to a complete halt. It was very frustating. My son is a computer genius. He can build computers from the ground up and he built this one for me. Whenever any of our family or his friends have computer issues, he is the one they call. He's a very smart young man and I'm so happy to have him (for more reasons than building computers for me, of course...LOL).
On to today's pin...It looks very similar to the tufted pins that I recently completed. They are alike because of the general shape of their petals. The main difference, though, is how the leaves are formed. The fabric is folded toward the center which leaves a little gap down the middle of each petal. It was fun experimenting. I topped it with a faric yo-yo and a button.
This is a sneak peek of my next project. Do you have any idea what these crazy looking objects will be? I hope to show you some completed pieces real soon.
Have a nice day and thanks for stopping by.
Aloha!
Friday, February 22, 2008
Mouse and Chirpy
About nine years ago this furby walked into our lives. We found him one morning tucked in the corner beneath our front door after a night of heavy thunder and lightening. He was so tiny and only about 8 weeks old. His soft mewing is what alerted us to him. It broke my heart to think of what this little boy had endured overnight. Today, he refuses to go outside and he's still petrified of thunder and lightening. He's grown into a handsome cat and a precious family member. He's smart too. He can shake your hand and sit on command. Hubster gave him the name, Mouse.
We acquired a peach face love bird from my nephew a couple of years before Mouse came into our lives. We aptly named him Papaya because his feathers are the colors of a ripe papaya. Somewhere along the way we started calling him Chirpy, probably because of his incessant screaching, I mean, chirping. He's a very loveable and smart bird. Unlike the stereotypical cartoon characters, Tom and Jerry, Mouse and Chirpy live harmoniously with each other. They even hold their own conversations, a back and forth banter of meow, chirp, meow, chirp... It really makes one wonder what they're saying to each other. Perhaps it would go something like, "I'm going to eat you," "No you're not!" Eeeeeks!
I know you were hoping for something other than flowers, weren't you? Well, I hope I haven't let you down too much. This pin is a cluster of ume and kanzashi blossoms surrounded by 3 tiny green fabric leaves. It's barely 2-inches and such a dainty little beauty.
Have a fabulous weekend, won't you.
Aloha!
Thursday, February 21, 2008
Progress...
Drumroll please. Finally, there is some progress to report. I have been digging in my heels and really working at finishing the tufted pins. It looks like my goal of completing all of them by Sunday is going to happen. I am very pleased.
On another note, I love Toaster Strudel. It is really heavenly to a sugar craving fiend like me. Waiting for it to cool down a bit would have been the wiser thing to do but I couldn't help myself. The result, a burned and blistered upper palate. All of that hot, gooey sugar was the culprit. Drinking hot tea with a burned palate is no fun either but since I'm a tea-a-holic, I couldn't help myself. And it burned it even further. But I'm not going to let that stop me one little bit. No, no, no, not me. I'm already planning what I'll be having for lunch.
Have a really sweet day, everyone.
Aloha!
Wednesday, February 20, 2008
A Trio of Angels
Hark! Hark! Look at this angelic trio of fabric yo-yo angel pins. I believe I've mentioned my love of fabric yo-yo's several times. I bet you were hoping it wouldn't be another flower, huh? Well, your wish has come true. I hope you enjoy them as much as I do.
Since we're on the subject of yo-yo's...here is a fabric eyeglass case that was just pleading for a yo-yo embellishment.
And last but not least, here is a handbag that I made and absolutely adore. I plan to make many more for myself in the coming year. After all, a gal's gotta have a matching handbag for each outfit she owns.
Progress on the tufted pins are going well. I will post a photo of my progress tomorrow.
Have a super day!
Aloha!
Tuesday, February 19, 2008
Painted Whimsy
This is another pin from the archives. Yes we're back to flowers once again. This
time a pot of roses made from small wooden shapes. If you've noticed that I seem to favor flowers, you'd be right. At one point I painted all kinds of things. Always with a very simple and uncomplicated style...easy and whimsical, always whimsical.
Since we're on the subject of painted flowers, take a look at some pots I painted. I know it has nothing to do with my declaration of February as pin month, but I thought you might like to see it since it is tied in with painting. I painted flower pots for my craft fairs for quite a few years. They are heavy to lug around and require a large amount of storage space so I decided to put it on the back burner for a while. I haven't been back to it in years.
Wishing you all a very creative day.
Aloha!
Monday, February 18, 2008
Angel Pins
Since I'm happily immersed in tufted flower goodness and probably will be for the duration of this week, I would like to share a photo of some pins that I made a while back.
By this time, I'm sure you all have been wondering if I make anything other than fabric flower pins. Surprise! The answer is...yes I do. You are looking at my ribbon angels. The base is made from plastic canvas. Thin satin ribbon has been woven through the grid to create it's body and wings. Although a little time consuming, they are very rewarding to make. Just looking at those chubby angelic faces make me want to pinch their rosy cheeks. Hope you enjoy seeing them. Now, back to the dungeon, err, I mean craft room to continue with those flowers.......
Aloha!
Work In Progress
These fabric petals have been gathered and need to be tied off into flower shapes. This isn't one of my favorite things to do so I'm saving it for another day.
A huge mass of tufted flower centers. They look like little icing flowers that would grace the cutest cupcakes. Just a little less than a hundred to go before this step is done.
Where has the coolness of winter gone? The warm, thick, humid air has left me lethargic and uncreative. I have been sitting in front of the televison for the past several days like a lifeless blob hand stitching and watching old episodes of I Love Lucy, Andy Griffith, The Beverly Hillbillies and the national news. All I have to show are the above work in progress photos. Hopefully tomorrow will bring new energy and creativity.
Aloha!
Friday, February 15, 2008
Fabric Yo-Yo Pin Cuteness
Today's post will be a quickie. Theres just too much to do today. The house is a total wreck. Mt. Washmore's calling my name. I need to gear up and seriously put a dent in the clothing mountain. I like to have my weekends free for doing fun stuff, not cleaning, so I'll be spending most of today in the trenches.
Today's pin is a tribute to the fabric yo-yo. I love fabric yo-yo's. At one point, almost everything I made was embellished with one. This pin is a cluster of three different sizes of yo-yo "flowers" and each has a coordinating button center. There are three fabric leaves to give this pin a corsage feel. Enjoy!
Happy Aloha Friday, everyone!
Thursday, February 14, 2008
Happy Valentines Day!
Red, pink, white and gaudy like all Valentine bouquets should be. Embellished with a glittery heart and yards of pink and red ribbon. Gorgeous! Thank you, dear hubbie. I love it!
Wednesday, February 13, 2008
Freshly Picked Strawberries
I love strawberries. Mostly fresh, but any kind will do. This is a photo of my strawberry cluster pin. Two berries fall from green satin rattail cording attached to fused fabric-to-felt leaves. The berries have been beaded with glass seed beads to give them a little bit of shimmer and shine. Every strawberry needs a little bling.
This is my current WIP. It will eventually end up being the quilted tufted pins from yesterday's post. All 300 of them will find their way to several craft fairs that I do at years end.
On another note...the poor picture quality on this blog is probably making you want to dig your eyeballs out. I don't blame you because it sure is doing that to me. I don't know if the saying that "something is better than nothing" fits here. Perhaps I shouldn't be posting pictures until I get it right. Maybe I'll just leave them for days when I feel miserable and want to torture you. JUST KIDDING. Can you feel my frustration? Today's photo's aren't any better. It is becoming evident that I stink at taking pictures. I know, I know, practice makes perfect and I should just shut up and practice some more.
You probably won't believe it, but my middle sister is an ace at taking beautiful photos. She is the one that is recruited to photograph the special occasions of family and friends. Yes, even weddings. So you see, unlike what conclusion you may have come to, being a bad photographer isn't embedded in my genes. One day she's going to have to give me a lesson. So, if you're reading this, "D", give your older sis some schoolin' in the art of photography. Holy schmoley, if there was ever anyone who needed lessons, it's me.
I hope you all have a fabulous day. You can put your eyeballs back in their sockets now. I'm done.
Aloha!
Aloha!
Tuesday, February 12, 2008
In The Spirit of Quilting...
I have always referred to myself as a quilter wannabe. That is because I love the idea of combining numerous fabric prints into one compact little project. I enjoy the electic look of a flower, a stripe and some other small print together. Although some may think that the look is too busy, it is pure eye candy to me. I tried making quilts before and found that I didn't really care to deal with large amounts of fabric all in one project. Too overwhelming. I've made hundreds of machine quilted handbags, but those are the largest pieces that I will work with for the time being. I'm not ruling out quilts, by far, because I believe that is where my heart truly lies. I'm putting it on my long list of future endeavors.
Today's pin is in the spirit of quilting. It combines 4 different fabric patterns in one small project. The center is tufted in the style of the tomato pincushion. I added a small button to it's center. The petals are gathered and form pointy little tips. I love the look and hope you do too.
Aloha!
Monday, February 11, 2008
Happy To Have The Weekend Behind Me!
It's been a weekend of sporatic computer availability. I think my computer will be taking an early retirement. It's been frustrating to have a connection one moment and none the very next. Imagine this all day long. Blech!
The weekend was filled with a mixed bag of things. The chest freezer in the garage was thoroughly cleaned out and all of the UFO's were thrown away. The icebergs that had accumulated on the upper half of the freezer are no longer there with the help of dear hubbie. I now have an inventory list and a plan to use up it's contents before making any further purchases. Telling myself that I should have bought a frost free freezer is moot but I'm still kicking myself over that purchase. Most of the weeds that were taking up residency have now vacated the premises. The garage has been straightened and swept clean. My cutie-pie love bird, Chirpy, has a clean cage once again and best of all, I managed to start handsewing some of my pins.
Today's pin has petals that are shaped like the previous two that I've made. The flower is topped with a coordinating fabric yoyo and button. I have included a couple of buds to give it a corsage feel and completed the look by adding two lime green colored leaves.
Well, I'm off to the craft room to sew until I can sew no more. Onward and upward!
Aloha!
Friday, February 8, 2008
As Sweet As Rock Candy!
I don't know what happened to my post yesterday. As far as I can recall, I did nothing different than the day before. I promise that in real life I don't speak in choppy little sentences as indicated by that post. Those who know me can vouch for that. That was so difficult to read and I apologize. I'm crossing my fingers that this post will be okay.
Today's pin is named Rock Candy because of the vibrant fabric colors and shiny seed bead centers (and my immense love of sweet sugary candy). I'm such a dork to be naming my pins but for some strange reason it gives me great pleasure. Okay, now YOU say it...SHE'S SUCH A DORK! The center is a wet felted wool bead that I halved and then studded with glass seed beads. After wet felting, my hands get really, really dry. I mean uncomfortably dry and sometimes my skin peels. I know, you probably didn't want that much information concerning my dry, peely hands. Ewwwww. Anyway, if you have a remedy, I'd love to know your secret. Once again, sorry for the poor picture quality. I promise to keep practicing until I get it right.
As I'm typing this, the rain is starting to fall again. Someone needs to call Noah because we're going to be needing his ark real soon. The upside of all of this rain is that my palm trees are nice and green. The downside is that we now have an army of weeds that we didn't have several weeks ago. Seems they also enjoy the rain.
Well, I'm off to continue with the fabric cutting and pin making. Did I ever mention how much fun I'm having?
Aloha!
Thursday, February 7, 2008
George, is that an eyeball in the center of that flower?
I'd like to introduce you to my latest creation, The Eyeball Pin. That is
what I'm calling it because it's center reminds me of an eyeball. I know,
not a very appealing name, is it? Oh well. It was a fun pin to make
nonetheless.
I have been cutting fabric to make pins like a mad woman. At the same time,
I am eager to get going with other pins but all the cutting has to happen
first. I'm finding alot of fabric that I haven't seen in a long time.
They're the pieces that are buried under all of the bright and shiny new
stuff that I keep buying and piling on top of it.
We have been having the craziest weather lately. Several of the islands
have had enormous amounts of rain and flooding. We've been living under
flash flood warnings for more than a week. It's driving my husband and son
a bit crazy because it has put a damper on their golf game. Me, I'm enjoying
it just fine. I love to cozy myself with a good cup of tea and watch the
rain fall from the window of my craft room. At the moment, the sky is a very pretty shade
of blue with hardly a cloud in sight. We all know that could change
at a moments notice. Ahhh, just a normal part of island living.
I have to say that I am very excited to have started a blog. It doesn't
mean that I know what I am doing, though. I have been wanting to do this
for quite some time but never had the confidence to take the plunge. To be
honest, I am really very nervous about it as my computer and camera skills
are seriously lacking. Who am I kidding?? I don't have ANY computer or
camera skills. I'm flying by the seat of my pants. I guess we'll find out
real soon if I should have a blog or just continue to be a blog reader. *grin*
Aloha!
Wednesday, February 6, 2008
Fabric Pins, Anyone?
Aloha, family and friends. As you already know, I have a penchant for
fabric. I absolutely adore fabric. I love buying it, looking at it, touching it and creating things from it. Just talking about fabric makes me very happy. Okay, I'm a dork. Anyway, my plan for this year is to create as many things from fabric as possible. You get to see my endeavers, no matter where you are.
I'm designating February as fabric pin month. Yup, a full month of nothing but fabric pins. Doesn't that sound scrumptious? I think making pins from fabric and combining it with other mediums and embellishments would be so much fun to do. My goal is to create as many different kinds as possible. I believe that putting it in writing for all to see will push me to make it happen. I'm very good at laying guilt trips on myself so this should mean that I'll have a handful of pins by the end of the month. We'll see...
My first pin is a petite plum posy topped with a sprinkling of glass seed beads. It's so pretty when the light hits the beading. It makes my heart skip a beat. It is inspired by an old tomato pincushion that I've had for years. I've added a couple of fused fabric-to-felt leaves to make it that much more special. Please pardon the poor picture layout and quality. I hope to get better as time progresses.
Aloha!